
How to Prevent Mold Growth in Homes: 7 Steps
Table of Contents
- Why Mold Prevention Matters for Your Home
- Step 1: Control Indoor Humidity and Moisture
- Step 2: How to Prevent Mold in Bathroom
- Step 3: How to Prevent Mold in Basement
- Step 4: Improve Ventilation and Airflow Throughout Your Home
- Step 5: Maintain HVAC Systems and Air Filters
- Step 6: Use an Air Purifier for Mold Spores
- Step 7: Inspect High-Moisture Areas and Clean Regularly
- Frequently Asked Questions
Last Updated: October 20, 2026
Why Mold Prevention Matters for Your Home
Mold grows silently in damp spaces. To prevent mold growth is far easier than removing it after the fact.
Mold creates serious problems. It damages walls, floors, and ceilings. It triggers allergies and respiratory issues in family members.
The good news: you can stop mold before it starts. Most mold prevention comes down to controlling moisture.
At Aero Essence LLC, we understand how indoor air quality connects to your home’s health.
This guide covers seven practical steps to prevent mold growth in homes. Each step targets a specific moisture problem.
Step 1: Control Indoor Humidity and Moisture
The single most important factor in mold prevention is humidity control. Mold needs moisture to survive. Remove the moisture, and mold dies.
Your home’s humidity should stay between 30 and 50 percent. This range keeps mold from growing while maintaining comfort for your family. Above 60 percent, mold growth accelerates on cool surfaces like exterior walls, window frames, and basement corners.
Measure humidity correctly with a hygrometer
A digital hygrometer costs about $10 to $30 at most hardware stores and home centers. Buy at least two: one for the main living area and one for the dampest zone in your home (usually the basement or a first-floor bathroom).
Placement matters more than the device. Put the hygrometer:
- At least 3 feet above the floor and away from exterior walls
- Out of direct sunlight and away from heat vents, stoves, and space heaters
- In the center of the room, not tucked against a wall or behind furniture
Readings taken next to a cold exterior wall will run higher than room average because that surface is where condensation forms first.
Interpret readings and respond by threshold
Treat humidity readings as a trigger for specific actions, not a vague warning:
- 30-50 percent: Ideal. No action needed beyond routine ventilation.
- 50-55 percent: Watch zone. Run exhaust fans longer after showers and cooking. Open a window for 10-15 minutes on dry days.
- 55-60 percent: Act now. Run a dehumidifier in the affected room. Check for hidden leaks or wet spots nearby.
- Above 60 percent for more than a few hours: High risk. Run the dehumidifier continuously, inspect for condensation on windows and cold walls, and check the HVAC system for blocked condensate lines.
A common pattern is that humidity spikes after showers, cooking, and laundry, then falls once ventilation runs. If a room stays above 55 percent overnight with no activity, that points to a persistent moisture source, a leak, groundwater intrusion, or poor air exchange, rather than temporary steam.
Use dehumidifiers in damp areas
A dehumidifier removes water from the air. Place one in any room where humidity regularly climbs above 50 percent.
Basements benefit most from dehumidifiers. They’re naturally damp because they sit below ground. Running a dehumidifier in your basement prevents mold growth in that high-risk area.
How to use a dehumidifier effectively:
- Empty the water tank daily, or set it to drain continuously
- Keep doors closed to the room you’re treating
- Run it 24/7 during humid seasons
- Clean the filter monthly to maintain performance
- Set the target humidity to 45-50 percent; running lower wastes energy without extra mold benefit
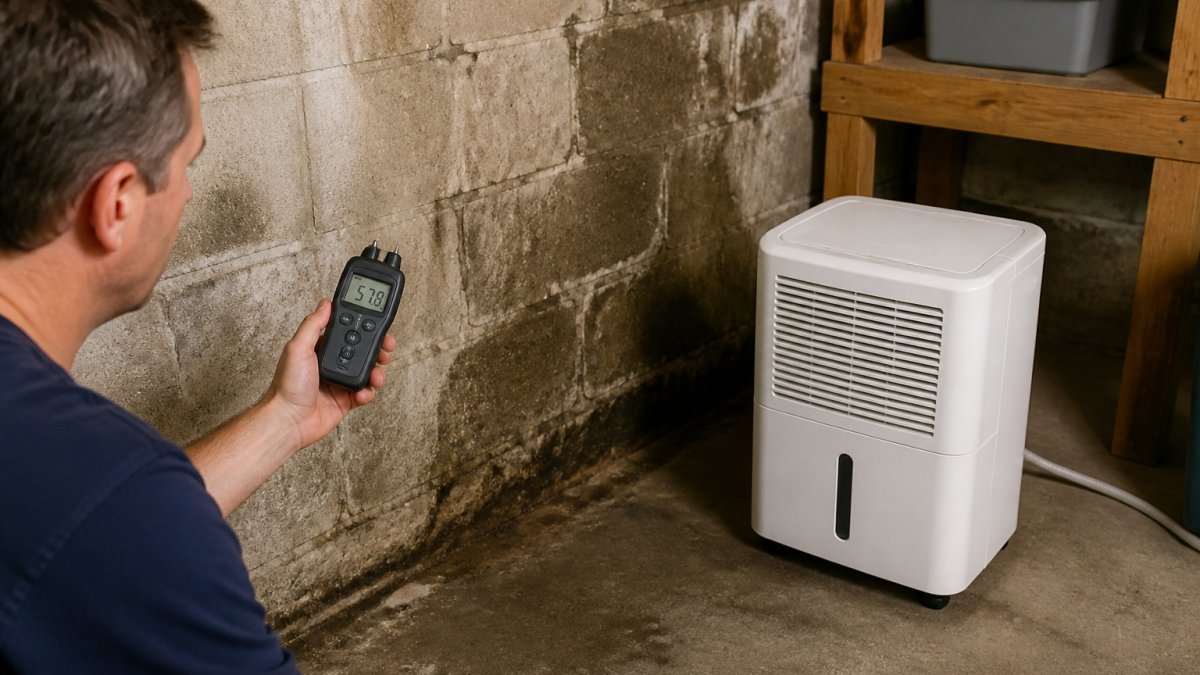
Log readings twice a day for one week, morning and evening, in the dampest room. A pattern of rising humidity over several days is an early warning that a moisture source is active, often before any visible mold appears.
Step 2: How to Prevent Mold in Bathroom
Bathrooms are mold hotspots. Steam from showers creates moisture. Water splashes on floors and walls. Wet towels sit in corners. This combination makes bathrooms ideal for mold growth.
Bathroom mold prevention focuses on removing moisture quickly after it appears.
Run exhaust fans during and after showers
Your bathroom exhaust fan is your first defense against mold. Turn it on before you step into the shower. Keep it running for at least 20 minutes after you finish.
This pulls steam and moisture out of the room before it settles on surfaces. Over time, this prevents mold from ever taking hold.
If your bathroom doesn’t have an exhaust fan, install one. It’s a simple upgrade that pays dividends in mold prevention.
Wipe down wet surfaces and dry spills quickly
Water sitting on bathroom surfaces feeds mold. A quick wipe takes seconds but makes a real difference.
After showers:
- Wipe down the shower walls and tub
- Dry the bathroom floor
- Hang wet towels outside the bathroom to dry
- Squeeze out washcloths and hang them to air dry
Moisture that sits for hours turns into mold risk. Moisture that dries within minutes never becomes a problem.
Step 3: How to Prevent Mold in Basement
Basements face constant moisture challenges. Groundwater pushes against foundation walls. Rain seeps through cracks. Humidity from the soil creates a naturally damp environment.
Mold in basements spreads fast because conditions are always wet. Basement prevention requires a multi-step approach that starts outside the foundation and works inward.
Inspect and repair water leaks immediately
Walk your basement after heavy rain. Look for water stains, damp spots, or active dripping.
Check these areas first:
- Corners where walls meet the floor
- Around basement windows
- Where pipes enter the foundation
- Along the foundation seams
- Under basement stairs and behind stored boxes
If you find water, fix it now. A small leak today becomes a major mold problem in weeks.
Small leaks often come from:
- Cracks in the foundation
- Damaged window seals
- Gaps around pipes
- Deteriorating mortar between blocks
For hairline cracks in poured concrete, a polyurethane or epoxy injection kit (available at most home centers) seals the crack from the inside. For block foundations, tuckpoint deteriorating mortar with hydraulic cement.
Fix grading, gutters, and downspouts first
Most basement water starts outside. Before sealing anything inside, make sure water drains away from the foundation:
- Grading: Soil should slope away from the house at roughly 1 inch per foot for at least 6 feet. Low spots that hold water after rain are the first thing to correct.
- Gutters: Clean them at least twice a year, spring and fall, and check that they aren’t sagging or overflowing during storms.
- Downspouts: Discharge water at least 6 to 10 feet from the foundation. Splash blocks help, but corrugated extensions or buried drain lines work better on wet lots.
- Window wells: Keep them clear of leaves and debris, and make sure the well drains or has a clear cover.
A common pattern is a dry basement after small storms but a wet one after multi-day rain. That usually points to saturated soil and poor surface drainage rather than a single crack.
Control ground vapor and interior moisture
Concrete is porous, and moisture vapor moves through it even when no liquid water is visible. A basement vapor barrier, a heavy plastic sheet (6 mil or thicker) over a gravel base under a slab, or a sealed liner on crawl space walls and floor, reduces vapor transmission.
A sump pump handles water that reaches the footing drain. Test it before storm season by pouring a bucket of water into the pit and confirming the pump kicks on and discharges well away from the foundation.
Keep the basement dry day to day
- Run a dehumidifier set to 45-50 percent, especially in summer
- Avoid storing cardboard, paper, and fabric directly against concrete walls
- Elevate stored items on pallets or shelving at least a few inches off the floor
- Dry any spill or leak within 24-48 hours
Musty smell without visible water is a warning sign. It often means moisture is entering through the slab or wall joints and feeding mold behind finishes. Investigate before painting or paneling over the area.
Step 4: Improve Ventilation and Airflow Throughout Your Home
Stagnant air traps moisture. Moving air dries surfaces and prevents mold growth.
Ventilation works in two ways. First, it removes humid air from inside. Second, it brings fresh air from outside.
Open windows on dry days to let air circulate. Ceiling fans help move air around rooms.
In winter, opening windows seems wasteful. But cracking a window for 15 minutes daily still improves airflow without major energy loss.
Blocked vents make the problem worse.
Step 5: Maintain HVAC Systems and Air Filters
Your heating and cooling system moves air through your home. A clean system prevents moisture buildup.
Replace air filters every 1 to 3 months. Dirty filters restrict airflow. Reduced airflow means less moisture removal.
Have your HVAC system inspected annually. A professional checks for:
- Leaking condensation lines
- Dirty evaporator coils
- Blocked ducts
- Refrigerant levels
These issues create moisture problems that lead to mold. Catching them early prevents damage.
Clean condensation lines prevent water from backing up into your home. This line carries water from your air conditioner outside. If it clogs, water pools inside and creates mold risk.
Step 6: Use an Air Purifier for Mold Spores
Mold spores float in the air before they land and grow. An air purifier captures these spores before they settle.
This is where Aero Essence LLC’s SR100 makes a real difference. It removes mold spores from the air in your home.
The SR100 provides visual confirmation that it’s working. You can see the filter capturing pollutants.
For homes with:
- Pets (dander triggers moisture issues in carpets)
- Allergies (mold spores aggravate symptoms)
- Recent water damage (spores spread quickly after flooding)
- High humidity (more spores thrive in damp air)
An air purifier removes spores before they can grow into visible mold. It’s a practical complement to moisture control.
Step 7: Inspect High-Moisture Areas and Clean Regularly
Regular inspections catch mold early, before it spreads.
Check these areas monthly:
- Under sinks and around pipes
- Inside cabinets near plumbing
- Attic spaces, especially near vents
- Crawl spaces and basement corners
- Around window frames and sills
- HVAC drip pans and condensation lines
Early mold looks like small black or green spots. It might smell musty.
Larger patches (more than a few square feet) need professional removal.
Clean regularly in damp areas. These simple habits prevent mold from gaining a foothold.
Preventing mold growth in homes starts with moisture control and ends with regular maintenance.
Mold prevention is an ongoing process, not a one-time fix. Check humidity levels regularly. Run exhaust fans.
Frequently Asked Questions
What humidity level helps prevent mold growth?
Mold thrives in humidity above 60 percent. Aim to keep indoor humidity between 30 and 50 percent to prevent mold growth. You can measure humidity with an inexpensive hygrometer (available for under $20). If humidity stays above 60 percent regularly, use a dehumidifier to bring levels down. Basements and bathrooms are especially prone to high humidity, so monitor these areas closely.
How quickly should you dry a wet area to prevent mold?
Dry wet areas within 24 to 48 hours to stop mold from taking hold. Mold can begin growing on damp surfaces in as little as 24 hours under the right conditions. After spills, leaks, or water damage, use fans, open windows, and dehumidifiers to speed drying. For standing water or significant water intrusion, remove the water first, then dry the area thoroughly and inspect for hidden moisture in walls or under flooring.
Can an air purifier help prevent mold growth in homes?
An air purifier designed to capture mold spores can reduce airborne mold particles and improve indoor air quality, but it does not prevent mold from growing on surfaces. Mold prevention requires controlling moisture, improving ventilation, and repairing leaks. An air purifier is a complementary tool that removes mold spores already in the air, making it especially useful if mold is present or if you have respiratory sensitivities. Use it alongside moisture control for the best results.
How do you test for mold in a home?
Visual inspection is the first step: look for discoloration, dark spots, or fuzzy growth on walls, ceilings, bathrooms, and basements. If you suspect hidden mold, professional mold testing can identify the type and extent. Home mold test kits are available but may not be as reliable as professional testing. If you see visible mold or smell a musty odor, address moisture sources immediately and clean affected areas or contact a mold remediation professional if the area is large.